Hello readers, In this article i am going to guide you how you can use Kendo UI in your project for free. On demand one of the reader I got to know that there is no to-the-point stuff available that can guide you through it for free. So I am here to share this article to help you. I have used it in a MVC project. Follow steps one by one in addition to it snapshots are also attached for better understanding. Let us know if you feel any issue.
Step 1: Download Kendo UI
Goto Google and write ‘Download Kendo UI’ or goto this link http://www.telerik.com/download/kendo-ui-core
Step 2: Login
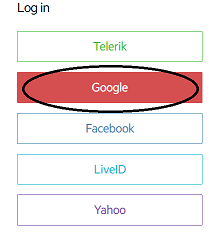
Login using any of your account or create a new account
Step 3: Start Downloading
Click on download button to start downloading. You will get a zip folder.


Step 4: Extract
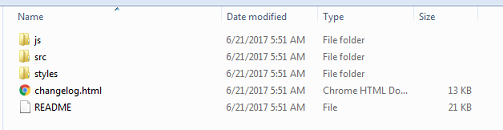
Extract all the files from the downloaded zip folder.
Step 5: Create Application
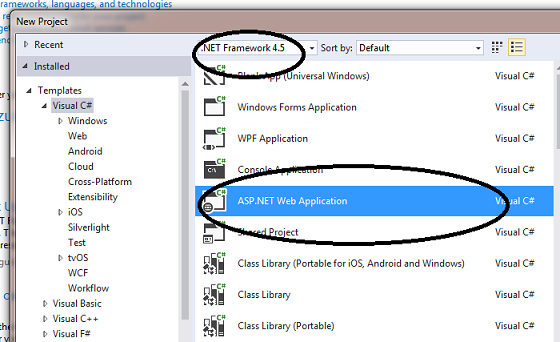
Create a new ASP.net web application (i used 4.5 Framework). Select MVC from template panel and then for simplicity I changed authentication to ‘No Authentication’. Deselect the option Host in the cloud. Finally click on OK to create the application.

Step 6: Put downloaded files into your project
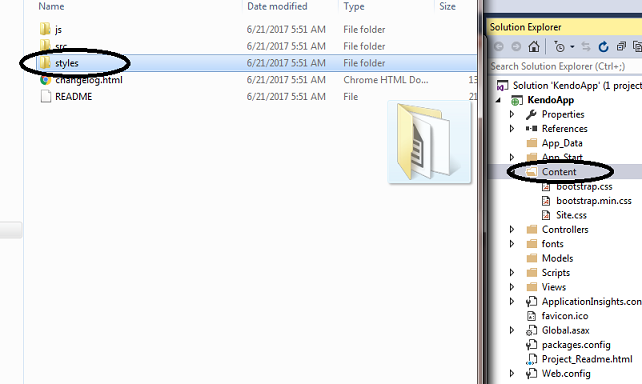
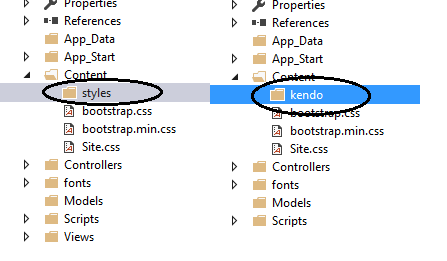
Now its time to copy the downloaded kendo files to our project. For that copy or drag & drop the ‘extracted styles folder ‘ under the ‘Content folder ‘ of your MVC project. (Click on Solution Explorer to see the full directory of your project)
Step 7: Renaming
Rename ‘styles’ folder to ‘kendo’
Step 8: Put downloaded files into your project
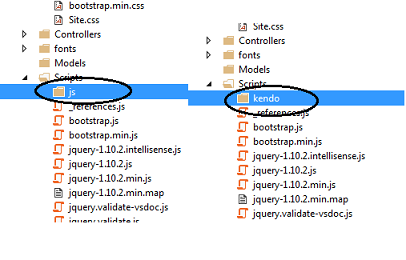
Now copy the ‘extracted js folder’ under the ‘Scripts folder’ of your MVC project same as you done in Step 7.
Step 9: Renaming
Rename ‘js folder’ to ‘kendo’
Step 10: Include files in project
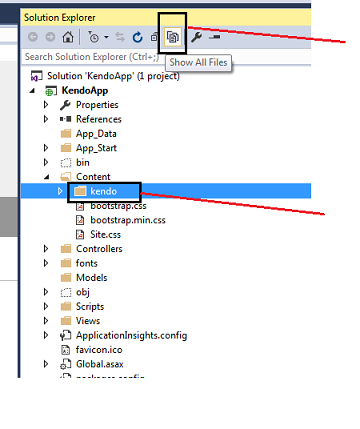
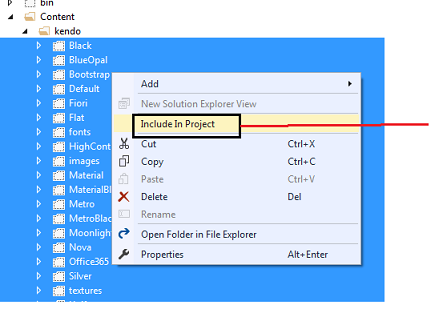
In Solution Explorer, click on icon for ‘Show All Files’, as shown in the figure below. and then click on ‘kendo’ folder to see the files that are not currently included in the project. Select them all , right click and click ‘Include in project’.
Step 11: Include files in project
Follow same steps to include all files of the other second ‘kendo’ folder added under Scripts folder.
Step 12: Add bundles in BundleConfig.cs
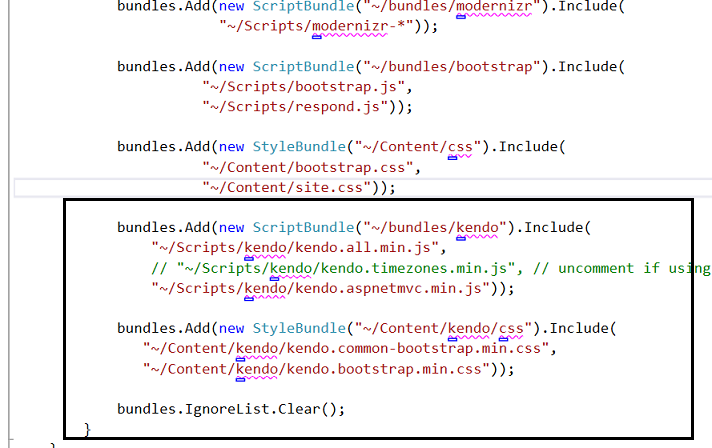
Now Open ‘BundleConfig.cs’ (App_Start/BundleConfig.cs) and add the below code at the end of the file.
“~/Scripts/kendo/kendo.all.min.js”,
// “~/Scripts/kendo/kendo.timezones.min.js”, // uncomment if using the Scheduler
“~/Scripts/kendo/kendo.aspnetmvc.min.js”));
bundles.Add(new StyleBundle(“~/Content/kendo/css”).Include(
“~/Content/kendo/kendo.common-bootstrap.min.css”,
“~/Content/kendo/kendo.bootstrap.min.css”));
bundles.IgnoreList.Clear();
Step 13: Add code for rendering
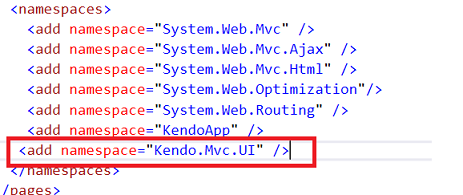
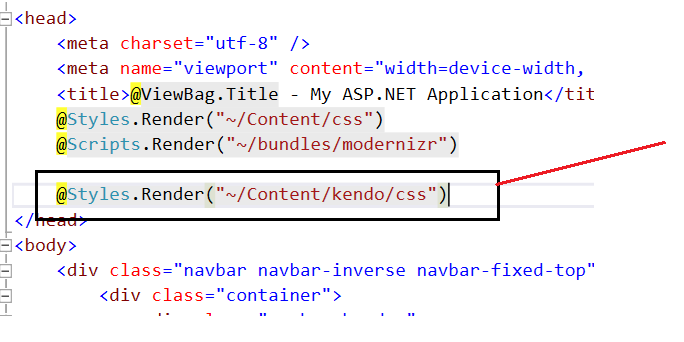
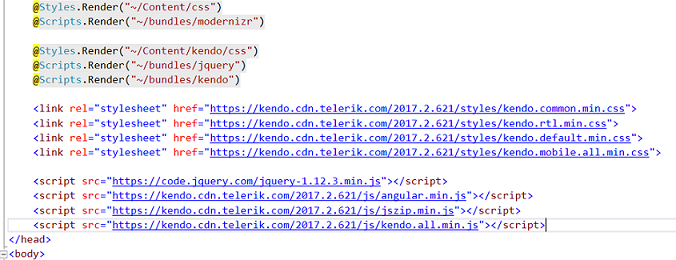
Paste the below code in ‘_Layout.cshtml’ (Views/Shared/_Layout.cshtml) for razor. If you are using ASPX paste in the ‘Site.master’. See image
@Styles.Render(“~/Content/kendo/css”)
@Scripts.Render(“~/bundles/jquery”)
@Scripts.Render(“~/bundles/kendo”)
For ASPX
<%: Styles.Render("~/Content/kendo/css") %>
<%: Scripts.Render("~/bundles/jquery") %>
<%: Scripts.Render("~/bundles/kendo") %>
Step 14: Comment
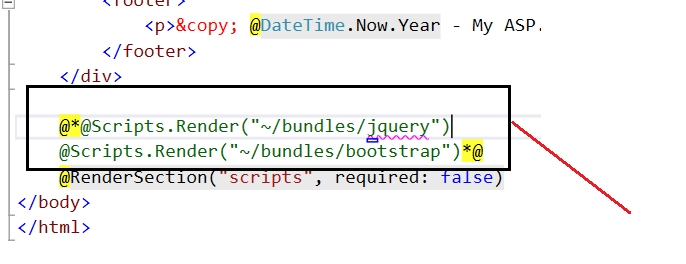
Comment out the below two Render codes in the same file. See image.
@Scripts.Render(“~/bundles/bootstrap”)*@
Step 15: Find Urls of latest files
Now open Google and Goto this link https://dojo.telerik.com/ . And Choose Library ‘Kendo UI 2017 R2 SP1’ from Dropdown available on top left corner and copy all the link and script tags.

Now Paste it in the same _Layout.cshtml file after the code pasted in step 13.
Step 16:Download all the css and js files of step 15
Copy the urls one by one and download the files from Internet. You can use ‘Internet Download Manager’.
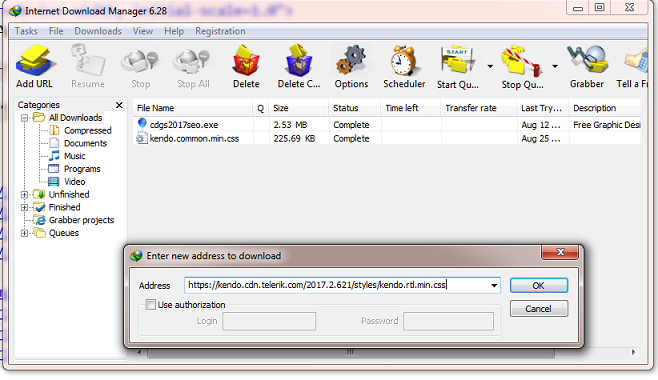
Copy all the css files in the Content/kendo folder.
Copy all the js files in the Scripts/kendo folder.
Note – While copying replace existing files.
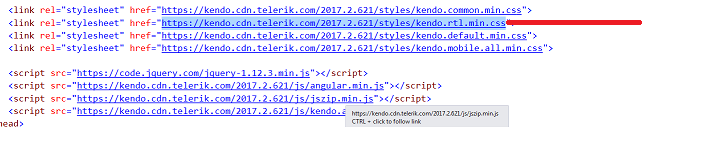
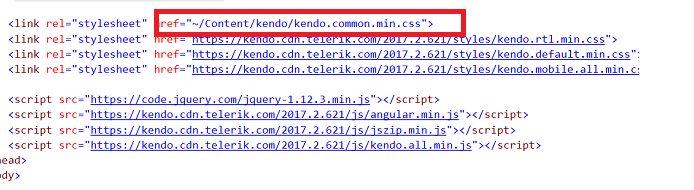
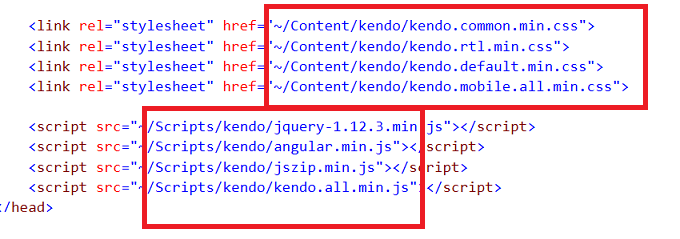
Step 17: Give Local file path name
Now replace the http: file path with the local file path name
Step 18: Add Binding Redirect
Open your Webconfig file and add one more

Step 19: Update webconfig file
Now open Views/WebConfig file and add one more